When to dig out hazel grouses after flowering and how to store before planting
Content:
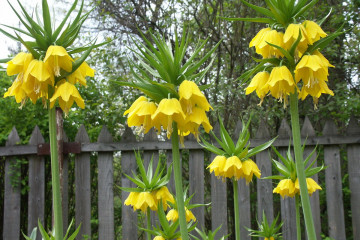
The majestic flowers, called Imperial hazel grouses for the variegated petals of the buds, grow naturally in the mountainous regions of Turkey, Iran, Afghanistan, and India. The plant is mentioned in documents from the 16th century. Two centuries later, monochromatic varieties were bred in Holland that are grown in temperate latitudes to this day.
Do I need to dig the Imperial hazel grouse every year
Fritillaria (this is the biological name of flowers) release buds in early spring. By the middle of summer, plants enter a dormant period, like many other bulbous crops (tulips, daffodils). The leaves turn yellow, dry out, the stem dries up. This is the moment when the grouse can be pruned after flowering.
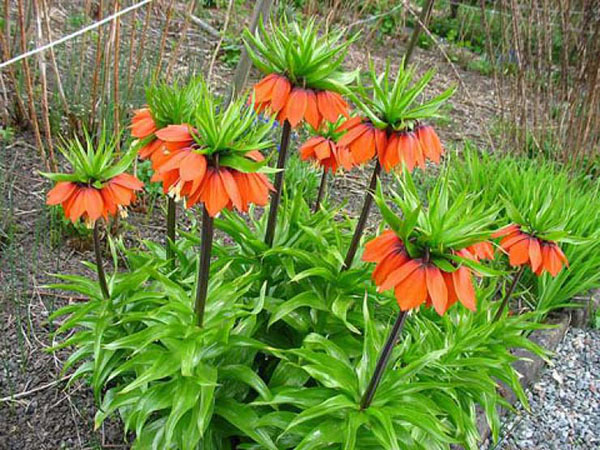
Each stalk of the Imperial Grouse produces 3 to 7 bells
Blooming "palms" are yellow, white, orange, crimson with a checkerboard pattern.
Withering stems look unaesthetic, but breaking them or twisting them is strictly prohibited, you can damage the delicate bulbs. Those who plant hazel grouse flowers decide for themselves when to dig up the plants. When "babies" are needed, it is better not to disturb the flowers for two or three years, so that the new bulbs grow to medium size. Flowering in this case, you can not wait. Fritillaria will release a pipe, fluff up the leaves, but there will be no buds on the top of the head.
Several reasons why it is better to dig up fritillaria:
- for a full-fledged bookmark of flowers, the plant needs to create natural conditions. In the middle of summer, a period of drought and heat sets in in the East. It is noticed that after holding the onions in a warm room, the number of buds on the Imperial hazel grouse increases;
- seed reproduction of buds will have to wait 7 years. Parts of the onions with the remains of the bottom bloom in the second year. Dividing the bulb is the best way to breed flowers;
- by the way, large heads with a diameter of more than 8 mm are cut into 4 parts so that on each slice there is a piece of the bottom, from which the roots sprout;
- As with all bulbous crops, the rhizome of hazel grouse sinks deeper into the ground every year. The sprout takes longer to germinate, the risk of decay increases. On dry, loose soil, plants are capable of producing a peduncle annually without transplanting. Small-bulbous varieties are more resistant to the weather conditions of temperate latitudes, they can not be disturbed for up to three years;
- enrichment of the soil with nutrients. For plants, you do not need to look for a new place every year, it is enough to add complex fertilizers, ash, lime to the existing plantation. Then the numerous buds of hazel grouse will delight next spring.
- protection of root bulbs from insects. They do not have a hard peel, a strong smell scares off rodents, but does not prevent the larvae of a bear, sawfly and other insects from feasting on juicy pulp;
- prevention of rot. Large-bulb varieties are especially often affected by the disease. Subtropical giants are less sick after summer drying. When hazel grouses are dug up in the summer, the bulbs practically do not rot.
Correct digging of hazel grouses after flowering
The main thing is to determine the required time for digging out the bulbs. In the open field, fritillaria are often placed next to other flowering perennials.
The hazel grouses have faded, what to do with them next:
- it is permissible to cut off the yellowing stem, leaving a stump up to 5 cm above ground level;
- if the yellowing foliage does not irritate, you can leave the faded hazel grouse before digging, but it is still better to remove the peduncles.
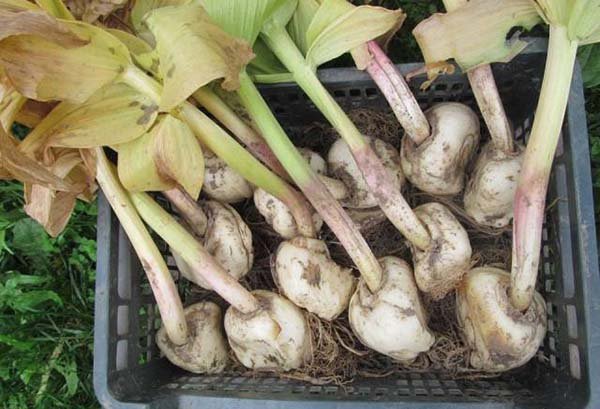
Fritillaria, dug out with a stem, are left to dry in a ventilated container. It is better to use mesh containers for this.
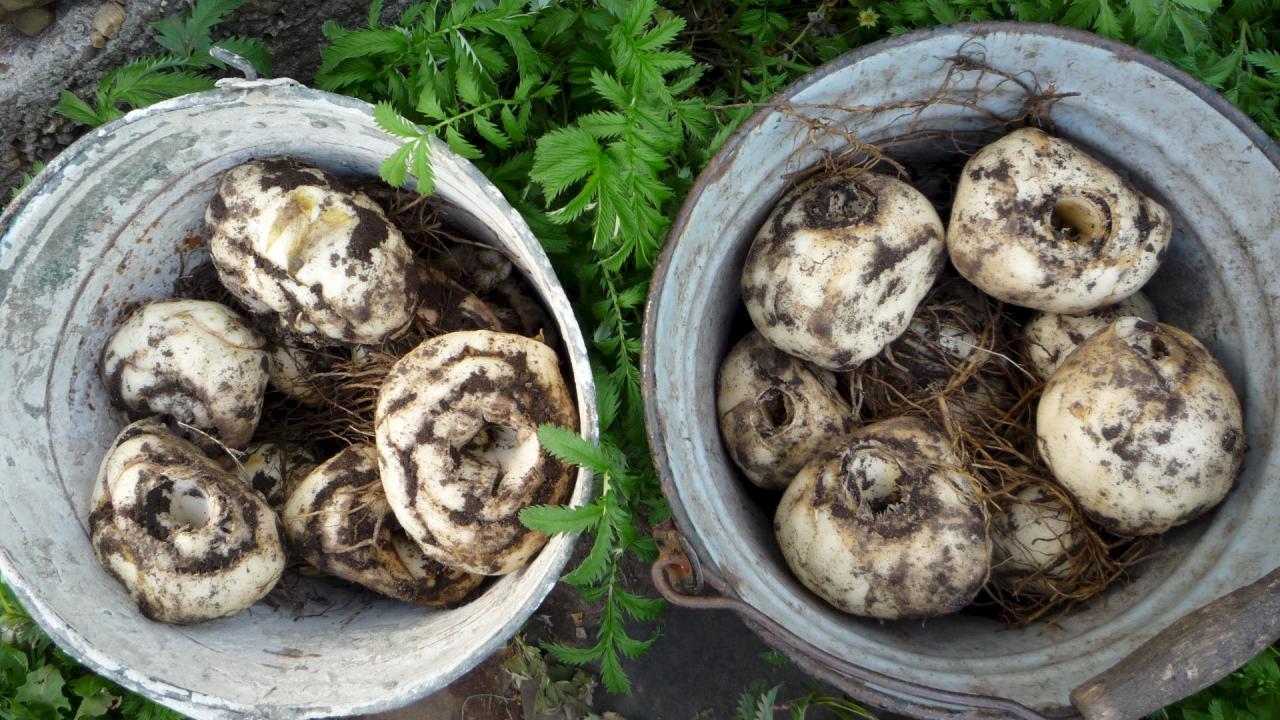
The main nuances of proper harvesting of hazel grouses:
- instead of a shovel, it is more convenient to use a pitchfork, they raise the top layer of the soil, loosen it;
- retreat from the stem by 15 cm, varietal root bulbs grow large;
- after removing large bulbs, they carefully dig everything up with a deep scoop in search of "kids";
- after loosening the earth, the bulb is removed by the lower part of the stem;
- dissected bulbs are not thrown away if part of the bottom is preserved, the damaged part after processing is stored along with the rest of the planting material (such a hazel grouse may bloom in a year, but the sprout should appear next spring);
- the dug out plants are left in the garden under the sun so that the earth dries well, ultraviolet light has destroyed putrefactive bacteria;
- bulbs are easier to remove from dry, crumbling soil, because in wet "babies" will be invisible.
The hazel grouse bulbs are "fried" under the sun for 3-4 hours, no more. With prolonged exposure to the light, they will wither.
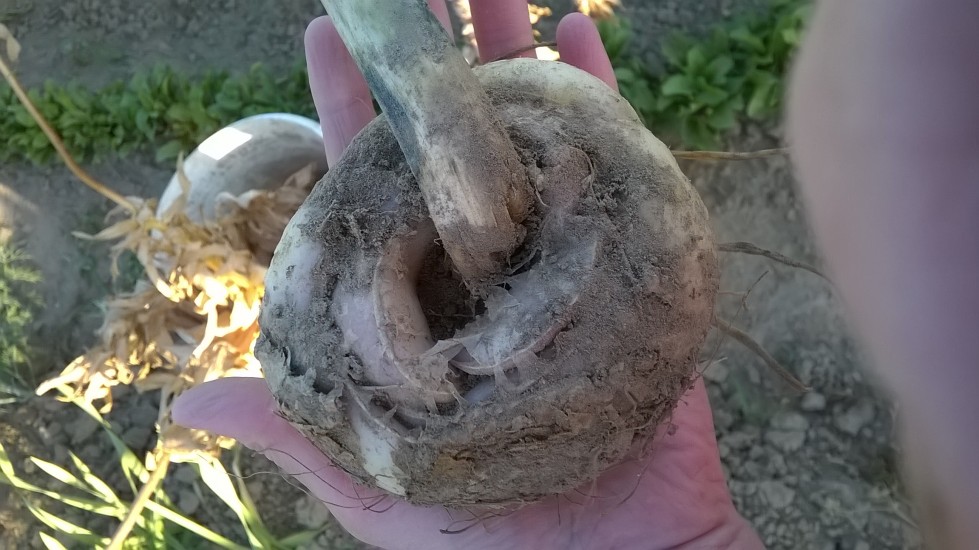
The stem or the remaining trim is removed from the head a week after digging, when the roots are completely dry. A deep fossa is formed in the head. This is normal. This is the unique feature of the Imperial hazel grouse from all other bulbous plants.
Following actions:
- manual removal of dry films, lumps of earth;
- washing hazel grouses: they are briefly soaked in a weak solution of potassium permanganate, rinsed, the dirty liquid is drained;
- inspection of the bulbs: rotten, damaged bulbs are laid separately for subsequent processing;
- sorting of planting material by size (only large bulbs bloom, small ones and embryos are folded separately for storage).
It is enough to wash healthy bulbs in a solution of manganese. The rotten areas of the scales are cut off with a knife. The blade is pre-wiped with hydrogen peroxide or chlorhexidine. The cut and areas damaged during digging are sprinkled with crushed tablets of activated carbon. If there is no coal, it is recommended to use pharmacy antiseptics available in any home medicine cabinet:
- iodine solution;
- brilliant green.
Growers begin to process the bulbs after the stem has been removed. Immediately after digging the plant, it is not worth wetting
Favorable time to dig up the bulbs for storage
When the hazel grouses fade, what to do next is described in the previous part of the article. Now it is worth dwelling in more detail on the timing of cleaning. Some advise: "I chose a day without rain - and get to work!" Light rain is not a hindrance if the ground is dry. Better when, three days before the digging, there was no precipitation and dense fogs.
It is good when the earth does not stick to the plant heads. Small young bulbs are better visible in the soil, the risk of damage to large heads is reduced.
Yellowing foliage is not always a sign that the hazel grouse is retiring. Leaves turn yellow, wither:
- with defeat by fusarium;
- leaf nematode infection (small sucking insects).
The hazel grouses must be harvested at the same time as the tulips. This is roughly mid-July. Those who constantly grow hazel grouses know by flower when to dig up a plant. Beginners are advised to dig in an extreme flower, see if the roots dry out. If they die off, become brittle, it's time to dig up the bulbs.
You should not hesitate in digging, especially if it rains or there is a sharp contrast between night and day temperatures. Under such weather conditions, the bulbs dormant in the soil are most vulnerable; rot quickly develops on the scales. The deadline for extracting flower heads from the ground is mid-August.
A bulb dug in dry weather is easy to clean. Films and scales are clearly visible on it. Sandy soil is brushed off with a brush.
Where and how to store hazel grouse bulbs after digging up
Storage space is selected according to several criteria:
- low humidity (no more than 65%);
- lack of direct sunlight (diffused lighting is allowed, since the bulbs are completely covered with mulch or peat);
- temperature from + 25 ° С to + 30 ° С.
The natural conditions of subtropical August are created for the roots, so that the hazel grouses have a full rest, they have laid flower buds for the coming spring. The number of inflorescences directly depends on the storage method. Bulbs are not placed at home because of the persistent, pungent odor.
Before the autumn planting, the planting material is harvested in a ventilated place, where the air warms up to the desired mark on the thermometer. The ideal option is the attic, or the ceiling of the shed of another farm building.
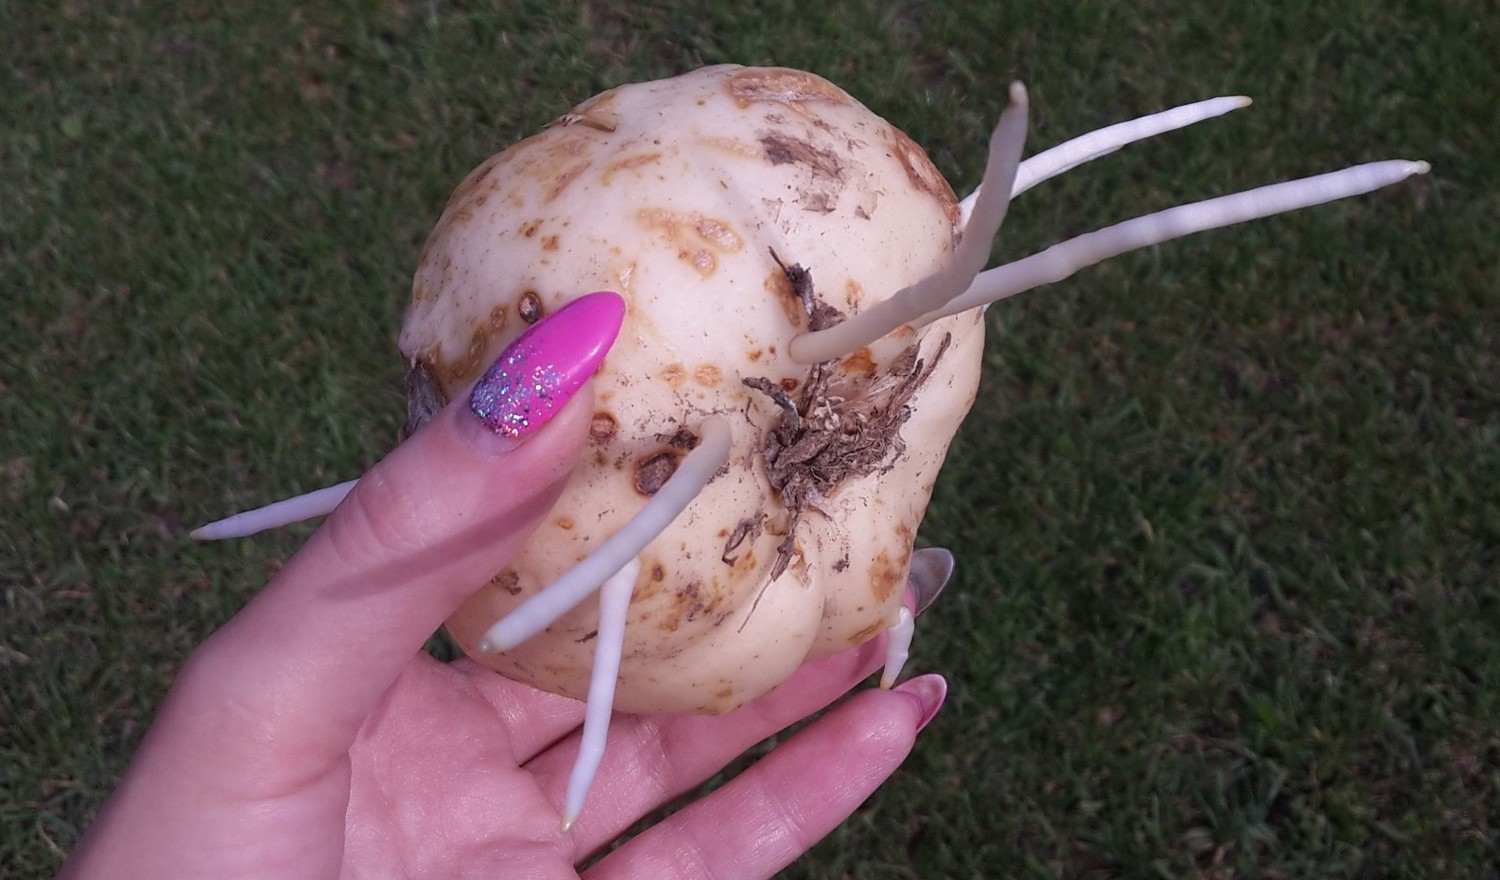
The bulbs will have to be stored until September, during which time sprouts and white roots should appear on them. During storage of planting material in a new place, it is periodically checked. Look for rot at the stripping sites. Particular attention is paid to damaged bulbs and scales left for planting. The planting material is covered with unexpected frosts.

By the end of storage, a sprout is visible from each head, up to four shoots grow from large bulbs. The roots stretch quickly only in high humidity.
To place the heads, choose:
- cardboard shoe boxes that are easy to open;
- rigid mesh containers (fruit store boxes);
- boxes with perforated walls.
"Children" are stored separately, they are planted in remote areas, they will need several years to grow. For full bloom, imperial hazel grouses should grow up to 7 cm in diameter.
By the way, small-bulb varieties are dug up and stored separately so that there is no confusion during the planting period.
When to plant hazel grouses
All planting material that has been preserved should preferably be planted at the very beginning of autumn. When the hazel grouse needs to be planted in a new place, they choose semi-shady areas protected from the wind. With a high occurrence of groundwater, drainage is required in flooded areas.The planting soil layers are preliminarily prepared. Sand is used as a baking powder; it is added up to ¼ of the volume to the soil mixture. The land is filled with humus and fertilizers.
The depth of the planting beam should be 2–2.5 times the size of the bulb. A drainage layer of sand is preliminarily laid at the bottom of the landing hole, with which it will be easier to extract the hazel grouse.
By the way, for the prevention of root rot, the soil is sprinkled with Phytosporin. This biological fungicide is a spore of fungi that develop on pathogenic bacteria. Myceliums are antagonists of fungal infections, preventing them from developing.
When too large nuts have grown on the bulb, they are laid out carefully so as not to break. The hazel grouses do not have time to restore the root system before wintering.
The distance between large bulbs is from 20 to 30 cm, "babies" can be planted in a checkerboard pattern after 5 cm.
Thus, it is profitable to grow your own planting material, because varietal bulbs are not cheap. Grouse Imeratorsky is one of the most beautiful spring flowering plants. This perennial pleases with bright buds, while all other plants are just gaining strength.